Sunday, March 20, 2016

Logitech M238 Mouse Not Recognized by Windows and Mac Computers

Hi all,

I cannot believe that it has been three years since I am not posting anything. Good news is I have something to share with you now. So let's move to our topic.

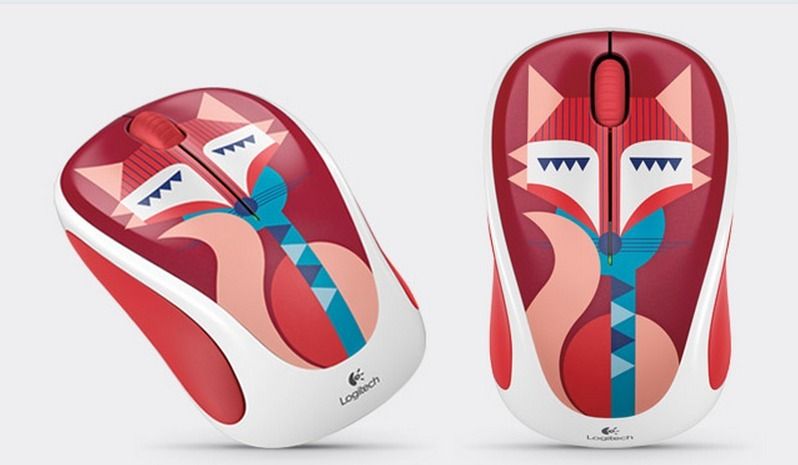
I always like using cute things. When I saw Logitech Colorful Play Collection Wireless Mouse M238 , I felt in love with them :) I immediately checked whether they were compatible with various operating systems. And yes! So it was time to buy one (I chose the fox model :P).

 photo LOGITECH MOUSE WIRELESS OPTICAL M238 FOX 910-004496 castleit.jpg

Well, I was not able to use it on my Macbook Pro with OS X El Capitan. I have tried to make it work on my Windows with no success. I was so sure that the mouse was not working. And I was ready to return it.

I have a Logitech K360 keyboard and a Logitech M325 mouse that I use on my Windows. Hence, I have two Unifying receivers. The funny thing is that I was never able to use a single Unifying receiver to use both devices. This is why two receivers were connected to my computer all the time. It is because I was not aware that we need a software to do it manually! So you should install Logitech Unifying Software to pair your multiple unifying devices with a single receiver. Next thing, I tried to pair my M238 mouse with this software. And it worked! I had one keyboard and two mouses working with a single unifying receiver. One mouse on my right hand, and the other one on my left hand, I was so happy. Of course, what's the point! :) It simply shows that my M238 mouse was working. The strange thing is that I was not able to use my M238 mouse with the original receiver coming with this mouse. But it worked with another unifying receiver. 

My next task was to make it work with my Mac. For this, I also looked for a similar program, and I found one that is called Logitech Options. I was able to use my mouse through a "unifying receiver". Again the original receiver was not working on my Mac either. 

So if your Logitech mouse is not working. Do not panic! Look for suitable softwares and try to make it work. I was lucky that I had an additional unifying receiver. 

Hope it helps you guys.

Update: I tried my M238 mouse on a different Mac now. It worked with the unifying receiver without installing Logitech Unifying Software. Maybe pairing the mouse with a Mac is enough to make the mouse work on different Mac computers. Just a thought :) 

Thursday, March 7, 2013

Ubuntu 12.10 RTL8192C Install Driver

Hello everyone..

I have a new computer now.. But I was not able to connect(!) to the Internet for a while.. And I can say that it was very painful to install a wifi driver on Ubuntu.. As I was successful, now I'm writing this for people like me looking for a solution to this same problem! :)

I have a USB wifi device that needs a RTL8192C driver to work properly.. Unfortunately, Ubuntu was not able to recognize my device.. Actually, it recognized it, but I was being disconnected every minute.. So I decided to install the driver manually.

First, I tried to install "ndiswrapper", and wanted to use Windows driver available on the Web/Device CD. I had many problems with installing ndiswrapper, activating drivers, blacklisting drivers.. so much work!!! And I ended up by reinstalling ubuntu, because my computer freezed and never worked again!! :/

Just try the easiest way to install! You are lucky that you have device that has Linux support. Simply, visit http://www.realtek.com.tw/downloads/searchView.aspx?keyword=RTL8192cu Download the driver needed as a tar file. Go to the directory where you downloaded device driver. In my case, file name is "RTL8188C_8192C_USB_linux_v3.4.4_4749.20121105".

tar -xzvf RTL8188C_8192C_USB_linux_v3.4.4_4749.20121105.tar.gz


This command will create a folder with all extracted files.

cd RTL8188C_8192C_USB_linux_v3.4.4_4749.20121105
chmod +x install.sh
sudo ./install.sh


If everything goes well, the driver will be installed. If you have an error like:

make: *** /lib/modules/3.5.0-25-generic/build: No such file or directory. Stop.
make: *** [modules] Error 2


Then, you have to install corresponding linux headers. In your case, another kernel version may be a problem. Just replace version number with whatever version you need.

sudo apt-get install build-essential linux-headers-3.5.0-25-generic


After that, you will be able to install device driver. Now, try to install again:

sudo ./install.sh


You will see that the driver is successfully installed. Reboot your system. And enjoy! :) Hope it helps guys..

Friday, August 10, 2012

Accessing Data Property Range values using Jena Framework

Recently, I'm working with semantic web technologies.. I have built an ontology, and now my task is to parse this ontology and generate individuals for classes..

Jena Framework is quite popular to use for building semantic web applications.. I use it for working with my ontology.. There are many tutorials and example codes on Web, so it is easy to work with Jena. And of course, Jena is an ongoing project, and it's not complete in terms of its methods..

One problem that I encountered with is that getRange() method for data properties is not working properly.. It is ok when you use xsd variables such integer, string and such.. But when you use an enumerated list as data property range, this method returns null..

I realized that this method returns a Class rather than a DataRange type.. So it is possible to iterate over enumerated list values using EnumeratedClass..

Now, I will detail how I solved this problem.. Will take an example from my ontology.. I have a class called, Liver. This class has some data properties, and one of them is, hasMarginType. This property has a value which is one of:

{"irregular"^^string , "lobulated"^^string , "nodular"^^string , "other"^^string , "regular"^^string}


And this is how it looks like in Protege:
Now, let's look at the code for parsing this range values using Jena.

//print Liver class data properties
        ExtendedIterator<OntProperty> it = Liver.listDeclaredProperties();
        while(it.hasNext()){
            OntProperty p = it.next();
            if (p.isDatatypeProperty() && p.getDomain()!=null && p.getRange()!=null){
                pr("Data Property Name: "+ p.getLocalName());
                pr("Domain: "+ p.getDomain().getLocalName());
               
                EnumeratedClass e = null;
                ExtendedIterator<RDFNode> i = null;
                if(p.getRange().asClass().isEnumeratedClass()){
                    e = p.getRange().asClass().asEnumeratedClass();
                    i = e.getOneOf().iterator();
                   
                    RDFNode prop = null;
                    String s=null;
                    pr("Range: ");
                    while(i.hasNext()){
                        prop = i.next();
                        s=prop.asLiteral().toString().split("\\^\\^")[0];
                        pr(s);
                    }
                }else{
                    pr("Range: "+ p.getRange().getLocalName());
                }
               
                pr("\n");
            }
           
        }


 This code prints name of a data property, domain of this data property and range value for this data property. Note that pr is a function used to print data on console. My focus was not having the namespaces, thus my output is like this:

Data Property Name: hasMarginType
Domain: Liver
Range:
irregular
lobulated
nodular
other
regular


I did not find a code snippet to work with.. So here it is my solution.. Hope it helps..

Wednesday, August 8, 2012

Installing Sesame Server on Ubuntu 12.04

I'm currently checking triple stores and wanted to install one of the most popular ones: Sesame. I hope seeing Ali Baba in few days :) But before that I had some issues while installing Sesame on Ubuntu 12.04.

Sesame offers a built-in console utility. And there is also a web interface: Sesame Openrdf-Workbench which seems to be easier than Sesame console. Current version of Sesame is OpenRDF Sesame 2.6.8 SDK.

In order to install Sesame server, there are two war files that need to be deployed to a java servlet container. And thus, it is expected that you have java (5 or 5+) installed in your system. 

As a java servlet container, I used Tomcat 7. First of all, I installed it via ubuntu software center. Default configuration creates a new user, tomcat7. /usr/share/tomcat7 is default home directory for this user. Once you install tomcat, you can start the server as:

/etc/init.d/tomcat7 start

stop and restart commands can be used in the same way. Once the server is up, you can see tomcat page in http://localhost:8080/. Now, try to use manager webapp in order to deploy Sesame wars. Note that you have to configure users by editing tomcat-users.xml. The sample entry has to be something similar to:

<tomcat-users>
  <role rolename="manager-gui"/>
  <role rolename="admin"/>
  <user name="admin" password="admin" roles="manager-gui,admin"/>
</tomcat-users>

After deploying the wars, you'll see that Sesame Workbench is not working and gives an error like: java.io.IOException: Unable to create logging directory /usr/share/tomcat7/.aduna/openrdf-sesame/logs

You get this error because Sesame tries to write to home directory, but tomcat7 has no write access to that folder. You can simply solve the problem with this:

sudo mkdir -p /usr/share/tomcat7/.aduna
sudo chown -R tomcat7:tomcat7 /usr/share/tomcat7 

Once you restart the tomcat server with:

/etc/init.d/tomcat7 restart

And try to access: http://localhost:8080/openrdf-workbench

You'll see that it works! By default, Sesame comes with a System repository. And it is possible to create new repositories, delete existing ones, querying and so much. Open Sesame!!

Wednesday, November 30, 2011

XML (w/o) Higlighting in Latex + using it in a figure - 2

Well.. I had a style conflict with my previous solution. So I gave up using a highlighted version, but just an XML text (with correct tab indentations of course!). I also needed to put a frame outside my xml document, and got this I found a nice Latex package called "fancyvrb". With a simple "frame" attribute, it works great.. Hope it helps!..

\begin{figure}[htbp]
\begin{Verbatim}[frame=single]
<task id="..." performer="..." type="...">
    <name>...</name>           
    <description>...</description>       
    <params>
        <param type="..." name="..." datatype="..."/>
        .
        .
    </params>  
</task>
\end{Verbatim}
% \vskip
\label{fig:spec_task}
\end{figure}